Quick start guides
Short, practical guides for running virtual sessions and customizing PlaySpace around the way you work.


Looking for something more specific?
Browse our articles, or email our support team.
Related articles
 Tools & features
How to Set Up a Virtual Play Therapy Office: A Guide for Therapists
Learn how to create an effective virtual play therapy office with the right tools, tech setup, and kid-friendly space for online sessions.
PlaySpace TeamMar 28, 2025 Activities for you
Types of Playrooms
Playrooms in PlaySpace are the heart of each play therapy session, offering a safe and comfortable space where clients can express themselves.
Sophia BuuOct 16, 2024
 Tools & features
Bibliotherapy: How AI Storybooks Can Enhance Child Therapy
Create personalized stories with PlaySpace’s AI Storybook, helping clients feel seen, understood, and supported.
Sophia BuuApr 17, 2025Getting Started with PlaySpace
A quick-start guide for running virtual sessions
PlaySpace is where you book client sessions, meet over video, and run therapeutic play activities together — either in an immersive Playroom or through the quick-access Toolkit. Here’s the whole flow, start to finish.
Step 1: Book a session
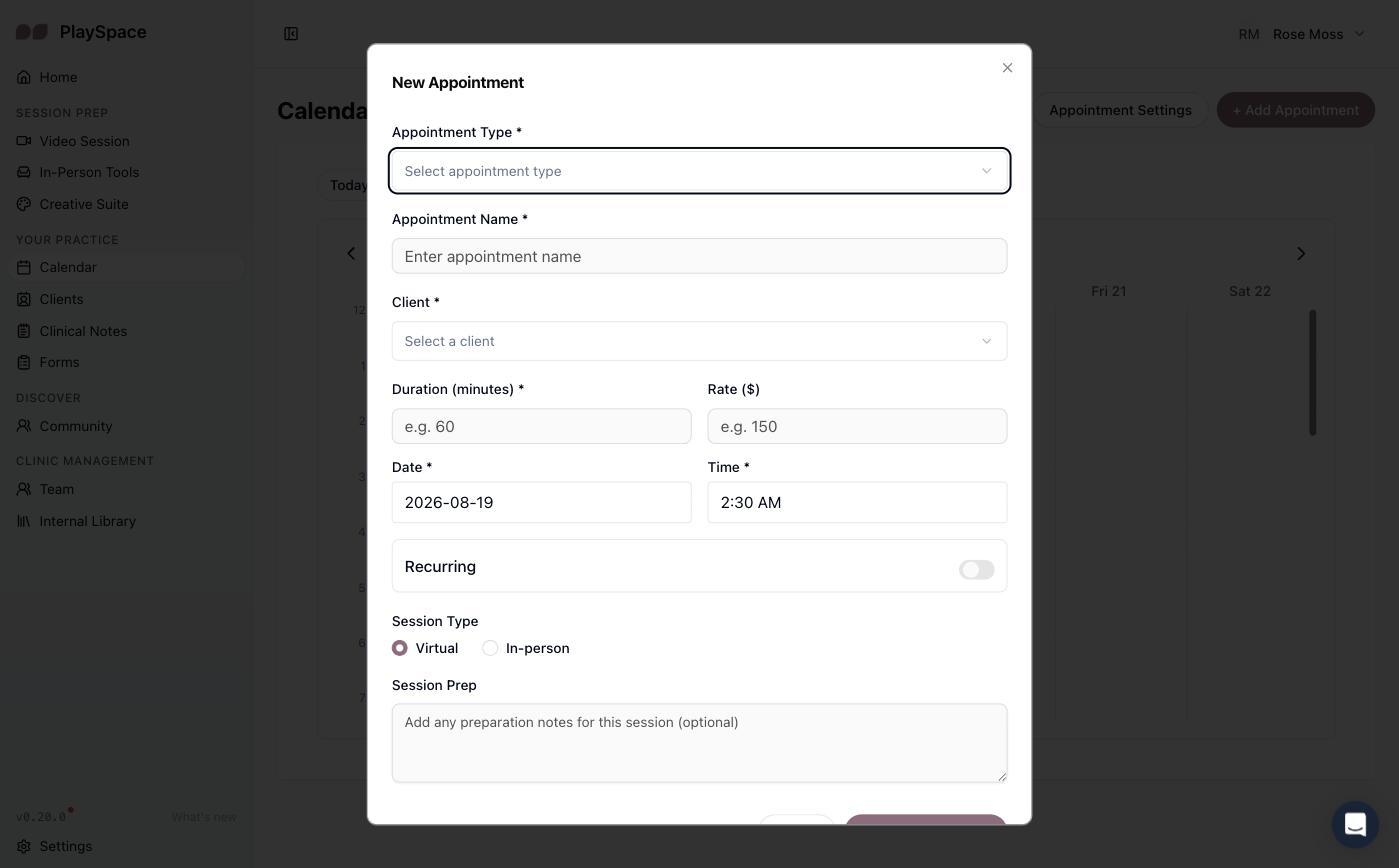
From Home or Calendar, click New appointment, choose a type and client, and set the date, time, and duration. Save it as Virtual to prep a video session.
 (opens the full-size screenshot in a new tab)
The New Appointment form — set the type, client, and time. Step 2: Send the link to your client
Open the appointment and click Copy Client Link. Paste it into an email, text, or reminder so your client can join with one click — no account needed on their end.
 (opens the full-size screenshot in a new tab)
Appointment details — Join and Copy Client Link live side by side. Step 3: Join the session
At session time, click Join from the appointment (or the Join session card on your Home page). This opens the video call, where you and your client land face to face before opening any activities.
Step 4: Open a Playroom or Toolkit
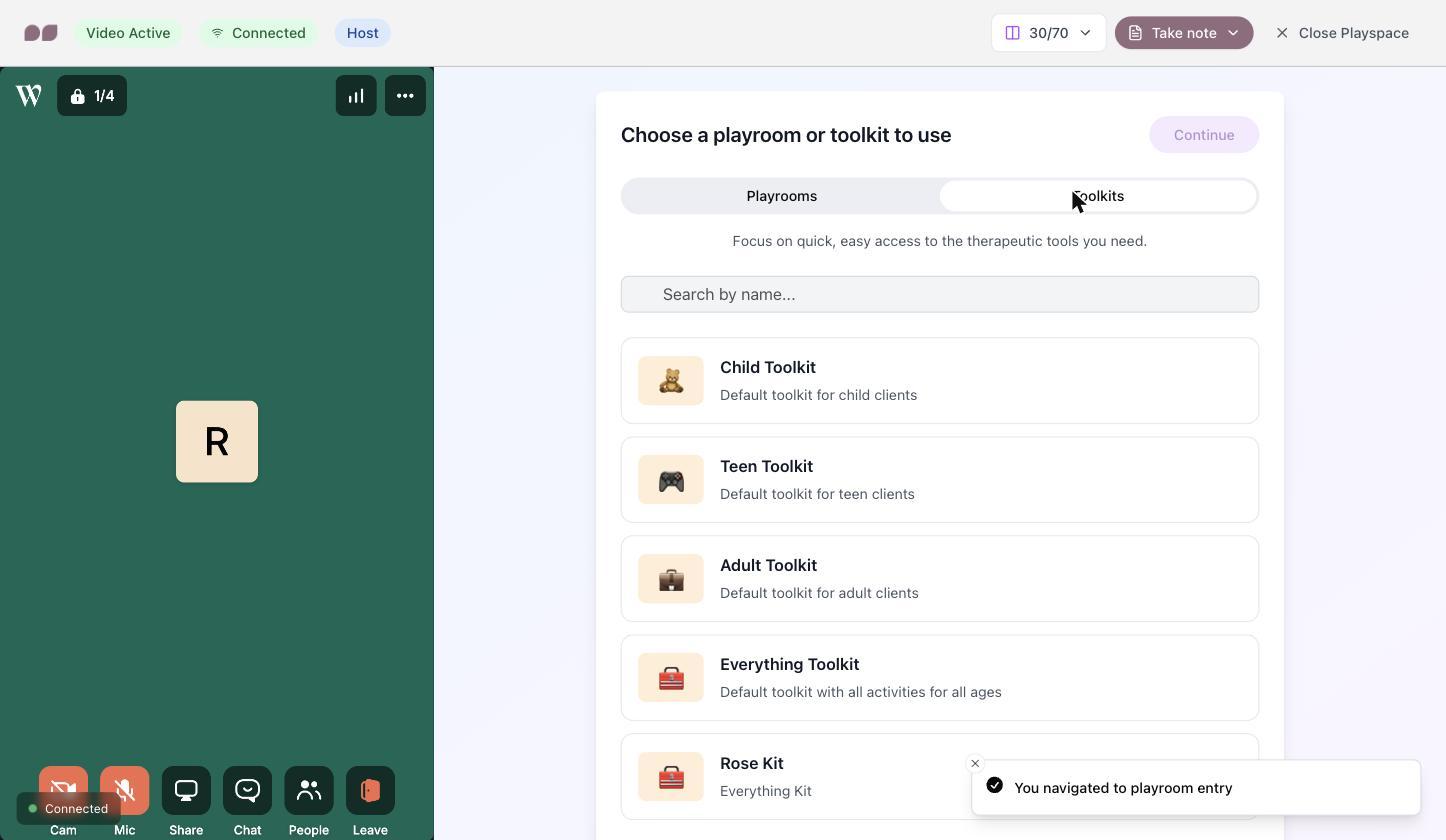
Once in the call, click Show Playspace to choose between a Playroom (an immersive room mirroring a physical play space) or a Toolkit (fast, focused access to individual tools) — each with Child, Teen, Adult, and Everything versions.
 (opens the full-size screenshot in a new tab)
Choosing between Playrooms and Toolkits inside a live session.
Looking for something more specific?
Browse our articles, or email our support team.
Playrooms & Toolkits
Choosing between Playrooms and Toolkits inside a live session.
Step 1: What’s inside the Playroom
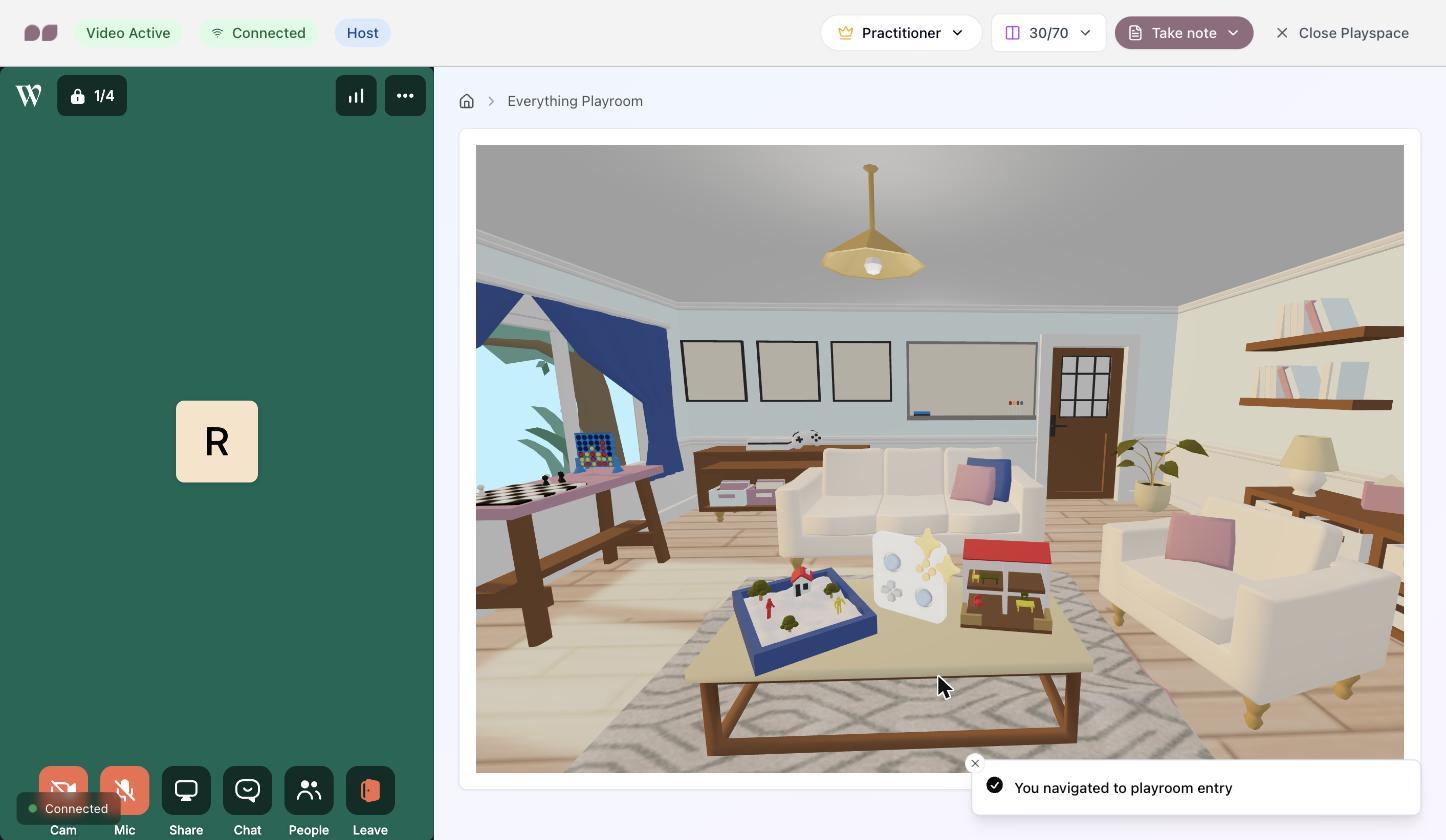
The Playroom is a furnished virtual room your client explores together with you. Click any object to launch its activity — a shared Sand Tray, a Dollhouse, a collaborative Whiteboard, and board games, all built for real-time, side-by-side play.
 (opens the full-size screenshot in a new tab)
The Everything Playroom, with Sand Tray, Dollhouse, Whiteboard, and games. Step 2: What’s inside the Toolkit
The Toolkit skips the 3D room for quick, focused tools: PlayStudio (build and run your own custom therapeutic games) and Whiteboard. Choose Child, Teen, or Adult presets, the Everything Toolkit, or a saved custom kit.
 (opens the full-size screenshot in a new tab)
Toolkit options, including custom saved kits.
- Book
- Send the link
- Join
- Play
Looking for something more specific?
Browse our articles, or email our support team.
Designing a Playroom (or Toolkit)
The Child, Teen, Adult, and Everything rooms are defaults — you can also build your own, picking exactly what’s on the shelf.
Step 1: Choose what’s inside
From Home, under Manage Spaces, click Playrooms → Create new. The editor has two tabs: Room Design (name, description, age group, color palette) and Content, where you toggle each category on or off — Activity Shelf, Multiplayer Games, Single Player Games, Whiteboard, Sand Tray, and Dollhouse. Disabled tools stay visible in the room but can’t be opened.
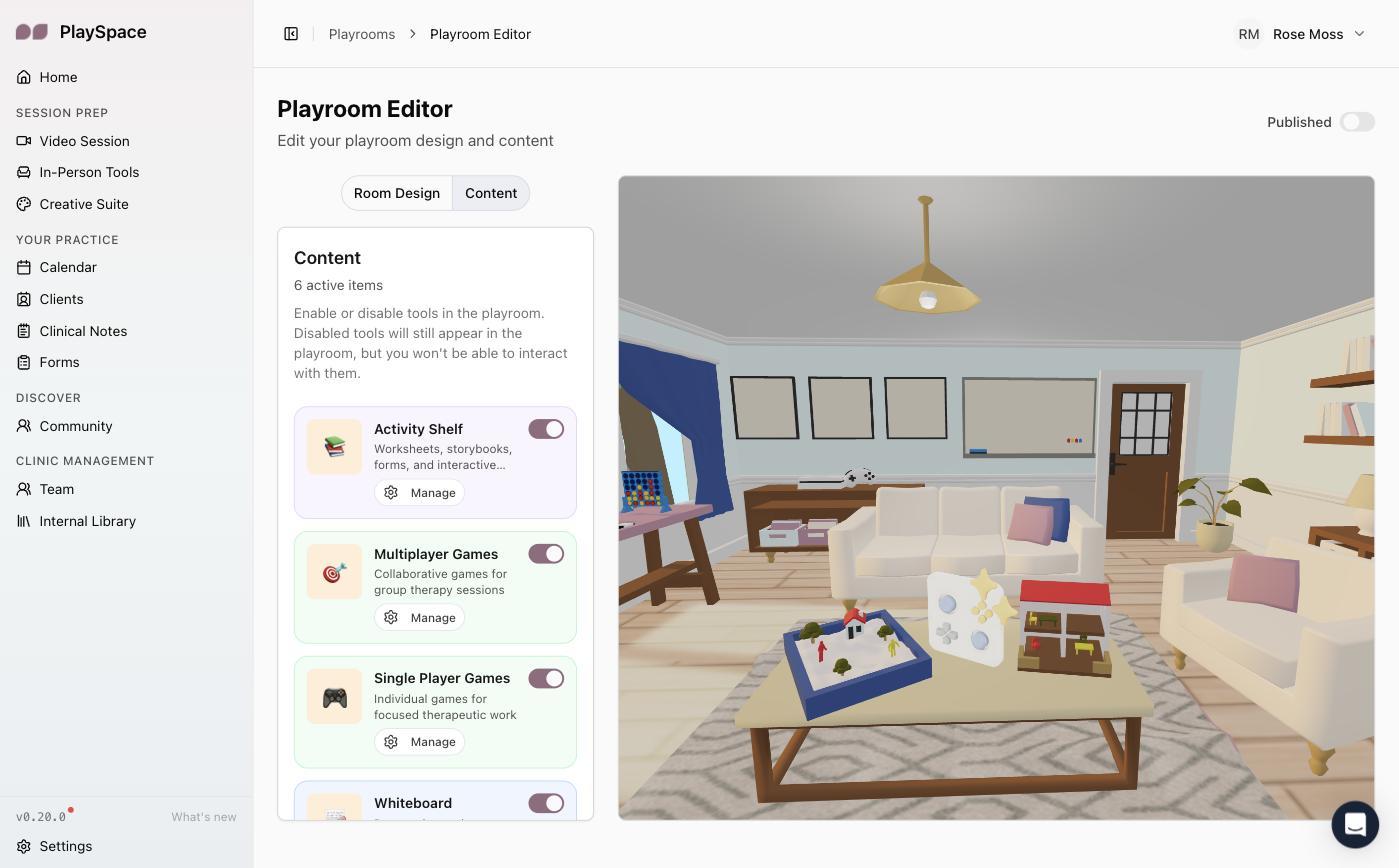 (opens the full-size screenshot in a new tab)
The Content tab — toggle which tools appear in this playroom. Step 2: Add storybooks and worksheets
From Home, Generate storybook opens an AI builder: describe the story, pick an age range, length, text density, and art style, and PlaySpace writes and illustrates it for you. Upload a worksheet does the same for your own PDFs. Both land on the Activity Shelf, alongside default worksheets and storybooks.
 (opens the full-size screenshot in a new tab)
The storybook builder — describe the story and set the age, length, and style.
Looking for something more specific?
Browse our articles, or email our support team.
Add storybooks and worksheets
Add your storybooks and worksheets to a specific room, and use the same content in Toolkits.
Step 1: Add to a specific room
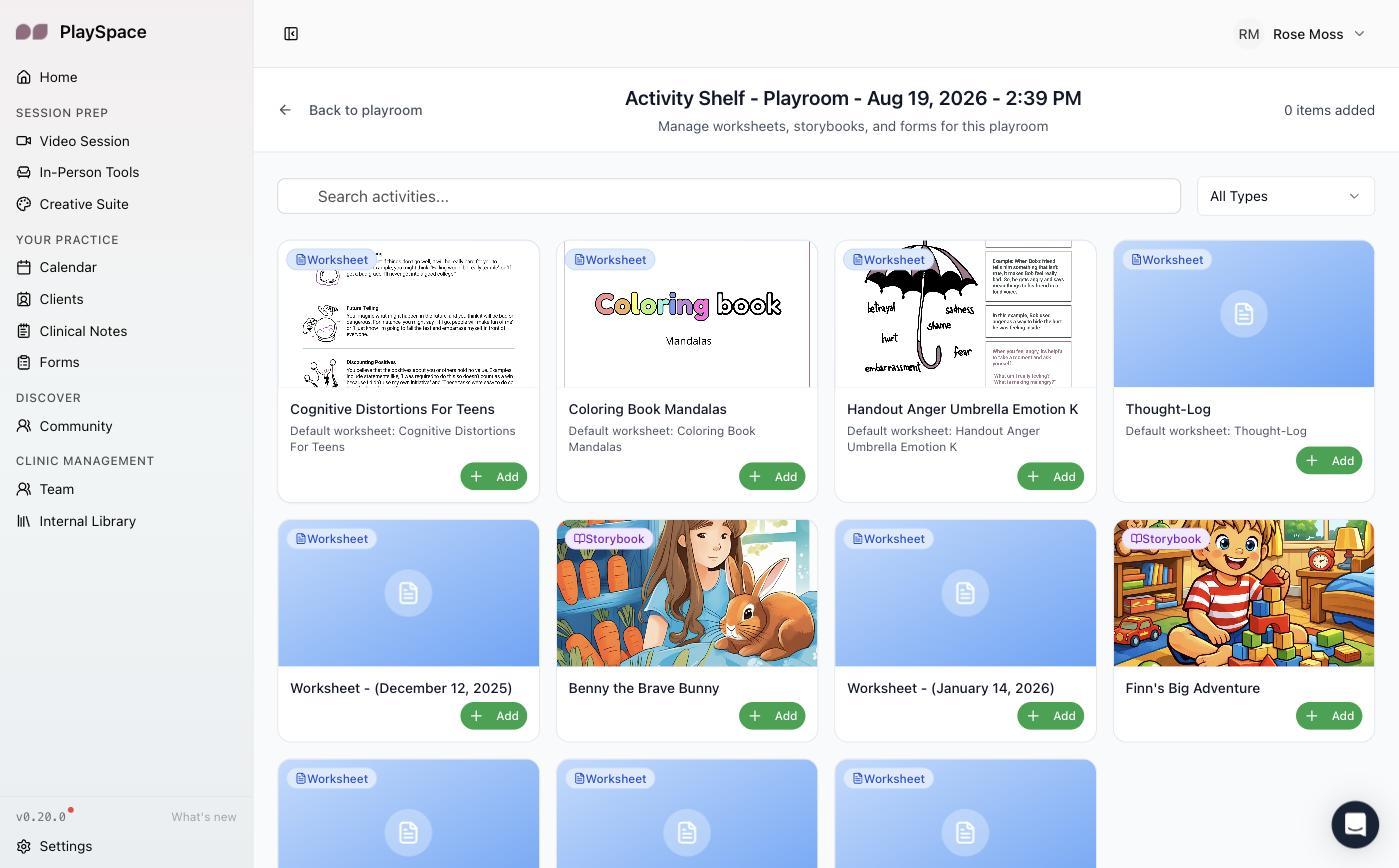
To enable one in a specific room, open that playroom, go to Content → Activity Shelf → Manage, and click Add on any worksheet or storybook you want on the shelf.
Step 2: Activity Shelf
The Activity Shelf manager — storybooks and worksheets, one click to add.
 (opens the full-size screenshot in a new tab)
Step 3: Toolkits work the same way
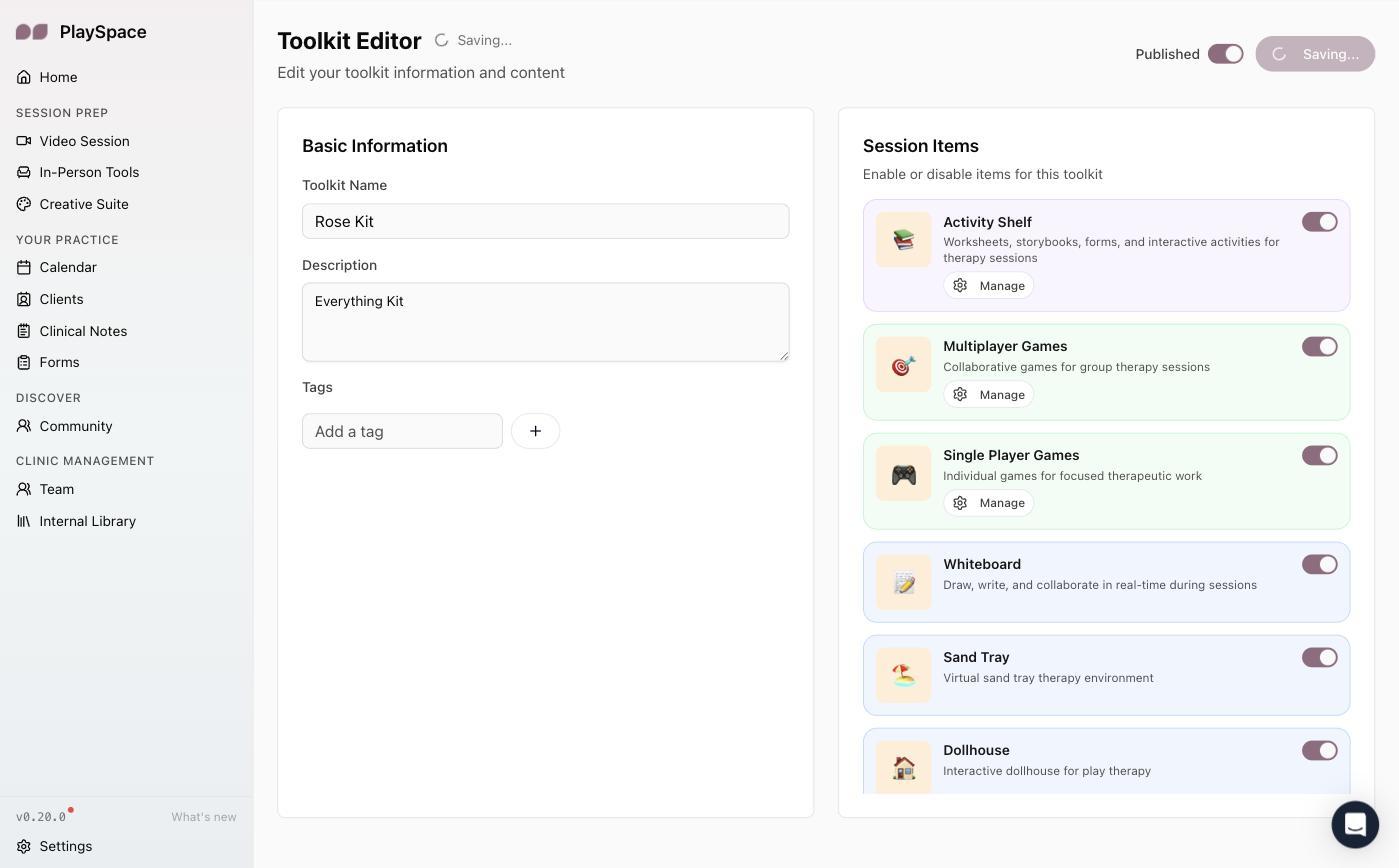
From Home, click Toolkits → Create new. You’ll see the identical Session Items list — Activity Shelf, games, Whiteboard, and more — so the same storybooks and worksheets you add to a Playroom’s shelf are just as available in a Toolkit.
 (opens the full-size screenshot in a new tab)
The Toolkit editor — the same toggle list as a Playroom’s Content tab.
Looking for something more specific?
Browse our articles, or email our support team.